
Learning to Make Soap: Part 14
My first attempt at a secret feather swirl
My first attempt at a secret feather swirl So this week I tried out a new technique, one that I have really been looking forward to having a go at ever since I first saw a YouTube video of it. It is called the secret feather swirl - I mean I am already all in and I haven't even seen the technique yet. Anyway with a number of soap batches under my belt now I thought I was ready to give this one a go.
From a colour point of view it is fairly simple, you only need 2 contrasting colours. I went for classic monochrome look of black and white. You also need a hanger - yes an actual hanger!! I had a metal one that was coated in plastic which was perfect for this trial run. And that is it really - so not too complicated yet.
So I made up my soap batter as per normal and got it to a very light trace or an emulsion. Basically there is no evidence of any free oils in the mixture - when you look at it on the stick blender it looks homogenous and doesn't seem to split into different components. Once the batter was at the correct consistency I weighed the whole batch and portioned off 20% of the batter and mixed it with 2g of activated charcoal to make the black portion/feather for my soap. The rest I just left as it was for the white portion.
Next I got my mould and poured the plain batter about a third of the way up the soap mould. Then came the trickier bit - what I was aiming to do was to lay down a thin layer of the black soap batter in the middle of the soap (so it wouldn't be visible from the side of the soap bar). This was a little bit more difficult than expected because my batter was a little bit too thin and I wasn't pouring out of the best type of jug (I was using a 1 litre Pyrex) so my aim wasn't great. This resulted in the black layer spreading out more than I wanted it to on the plain soap below (I was also worried it was breaking through the white layer below).
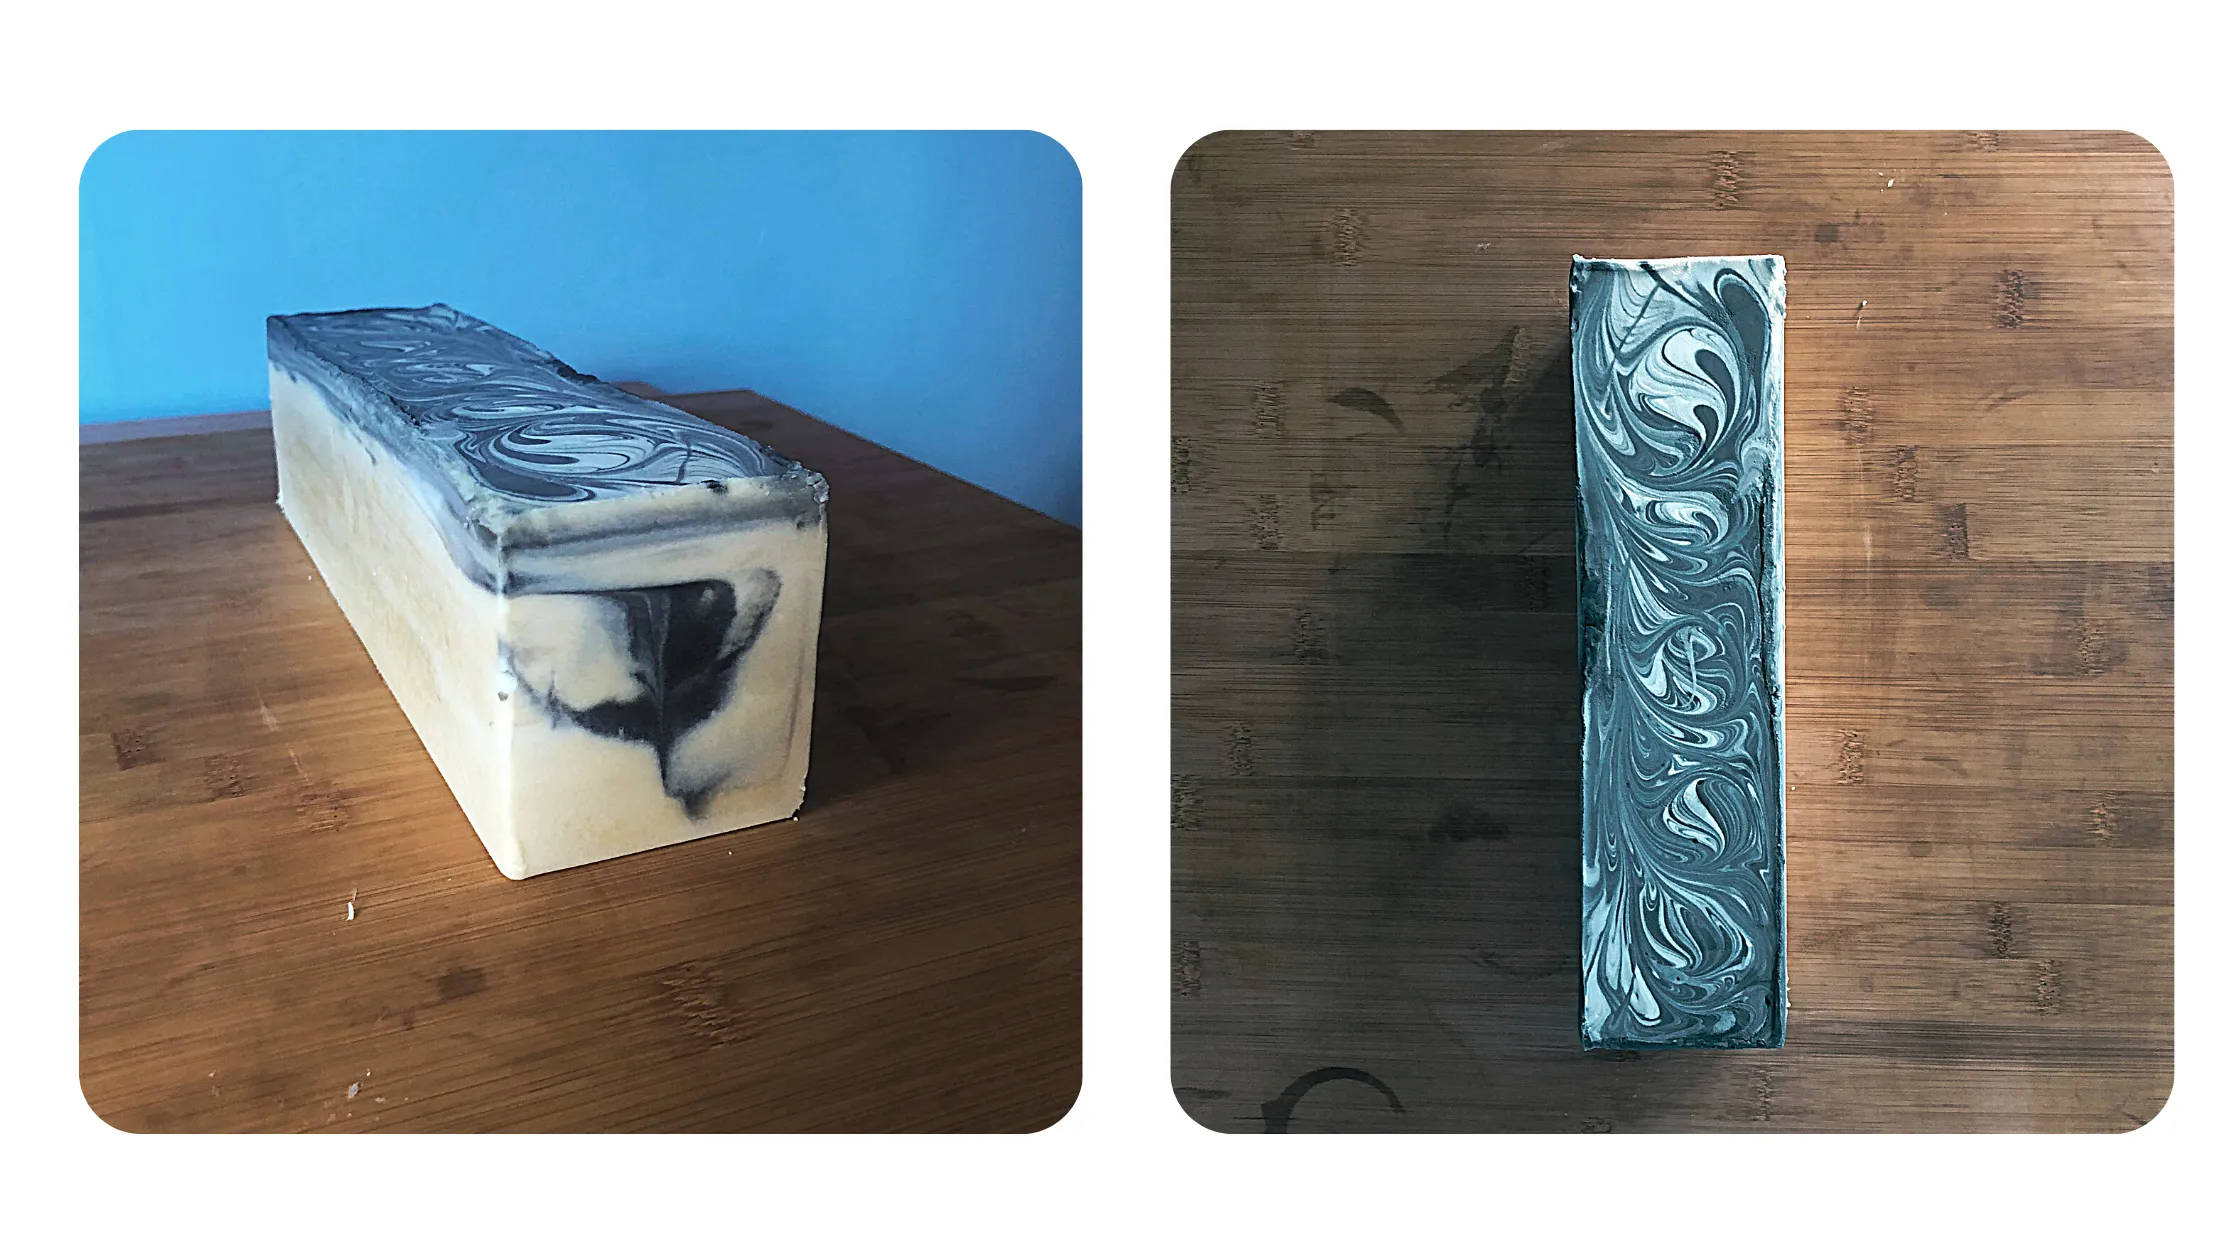
To rectify this I poured some of the white layer down the sides of the mould to force the black layer back into the middle and then poured the white layer directly on top of the black line using a spatula to break the fall to prevent it breaking through the layer below. Turns out pouring down the sides is a lot harder than you would think and sometimes I was pouring down the sides, but unfortunately it was the outside of the mould - not the inside!! Anyway the wall pour seemed to be doing the trick and I continued this way pouring the black batter followed by the white batter. After three layers of each and at the point when I started to run out of white batter I was happy I had done as many layers as I could . Next came the hanger swirl!
I had unwound the hanger and reshaped it so that it fitted lengthwise into my mould, with handles to allow me to manoeuvre the hanger once in the soap batter. So I took the hanger and went right down the middle of where I had put my black line of soap all the way to the bottom of the mould. Then I moved it over to one side of the mould, across the bottom of the mould and back up out of the mould, keeping the hanger as close to the side as possible. This action theoretically brings a bit of the black soap all the way through the middle of the design, through the white and black layers to form the spine of the feather.
Below you can see a short clip of this pour - I had no idea if it had worked I thought possibly not as the batter was too fluid but all I could do was wait!
After 24 hours I went to unmould the soap, but it was still a little soft (the weather had been really hot). I was really desperate to see if it had worked but instead of just going for it (and the inevitable disaster) I decided to be patient and left it overnight to firm up a bit more. When I checked the soap the next morning it definitely had hardened up so I felt confident I could go ahead with the cut - and to be honest there was no way I was going to wait any longer I was too excited!
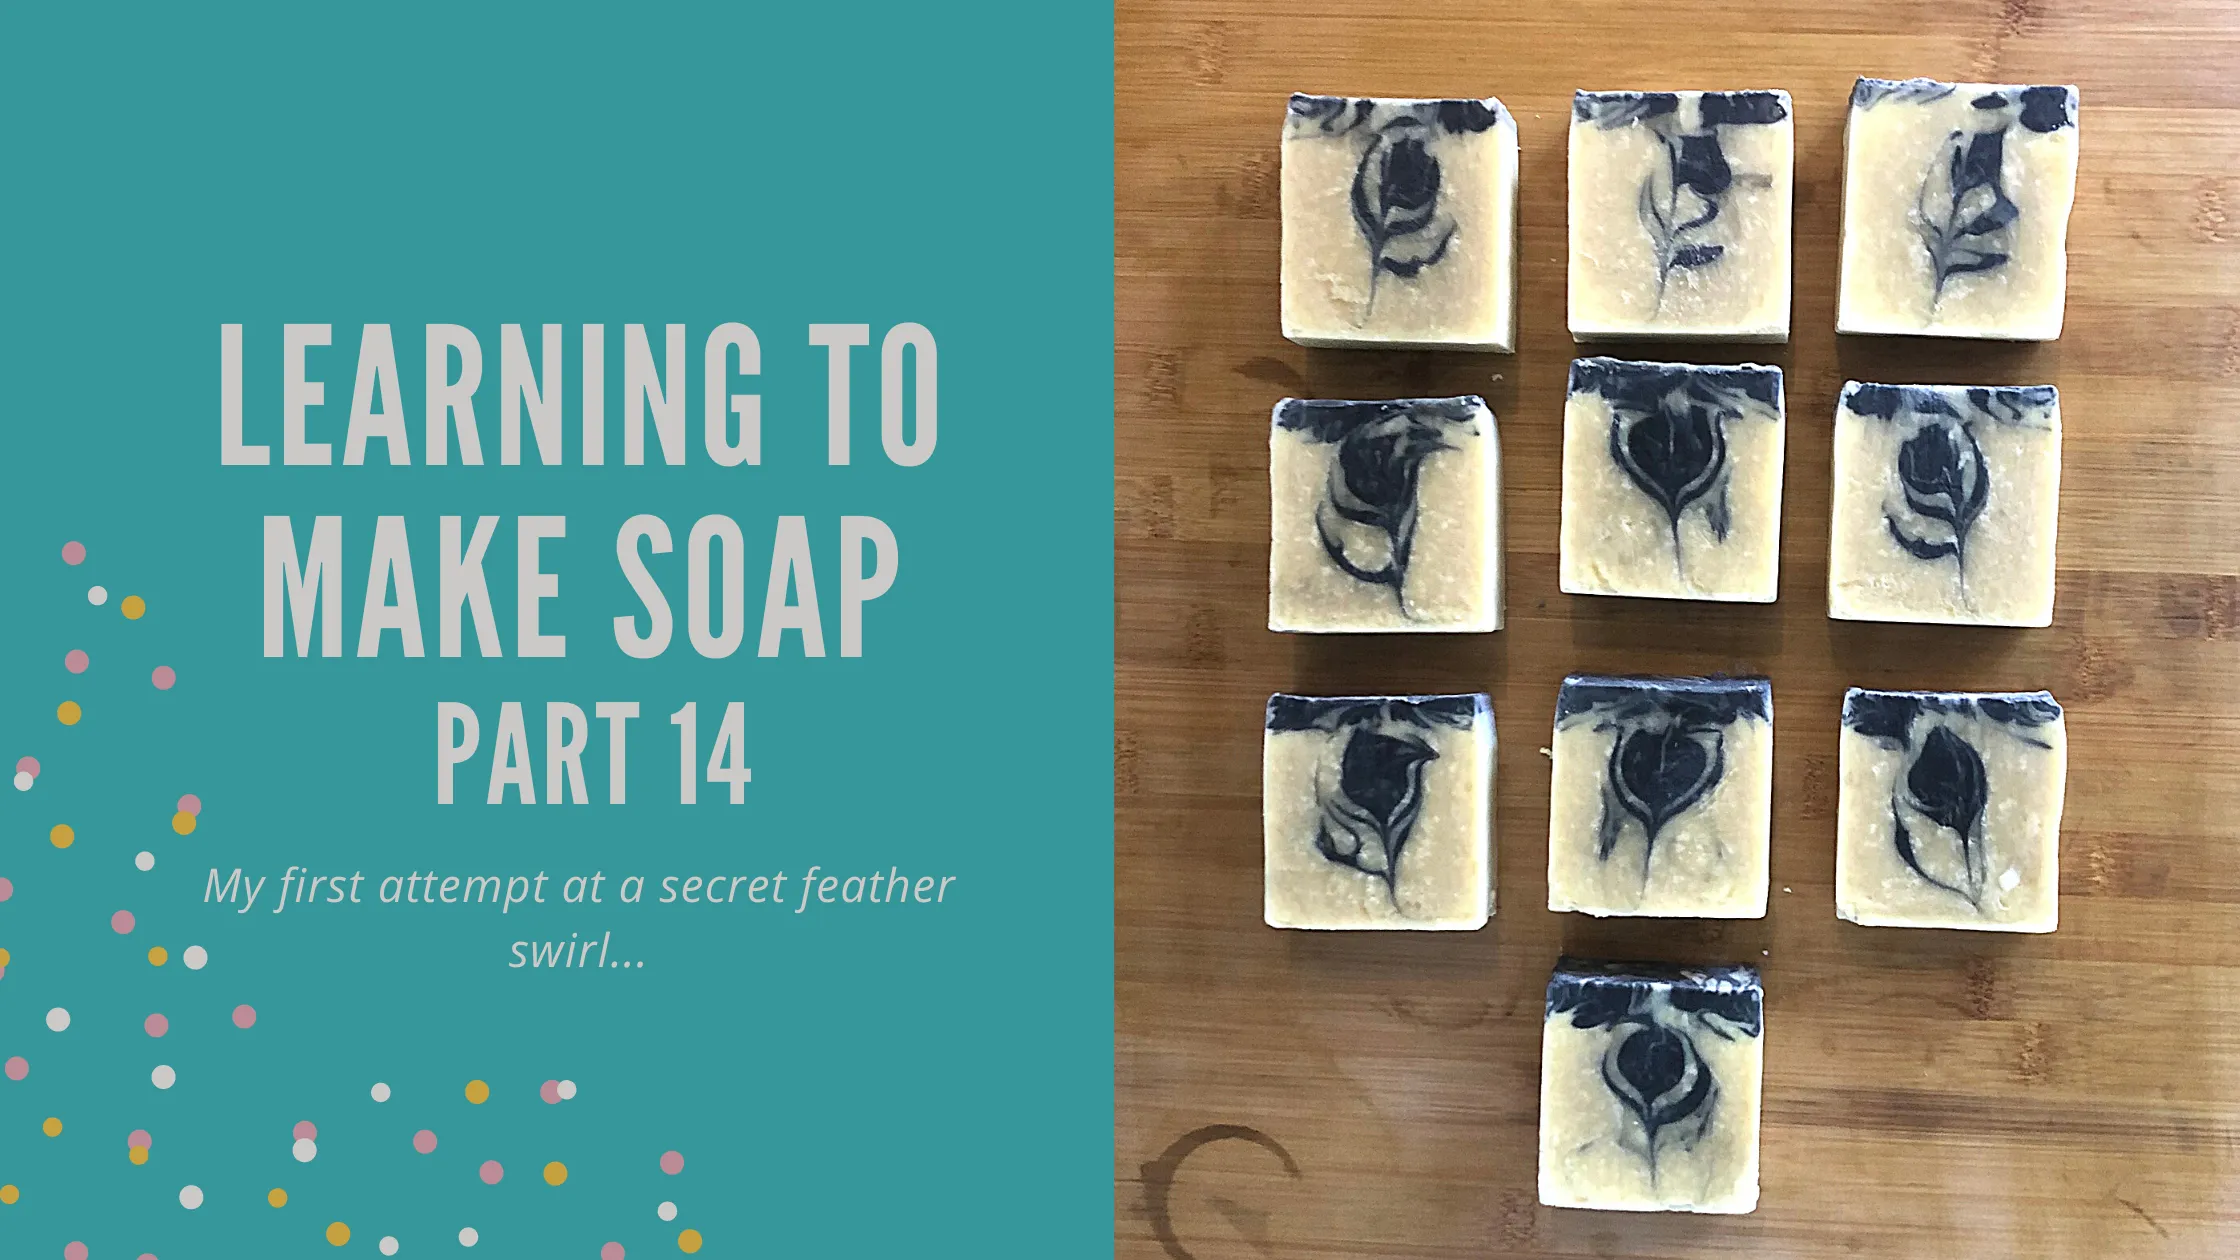
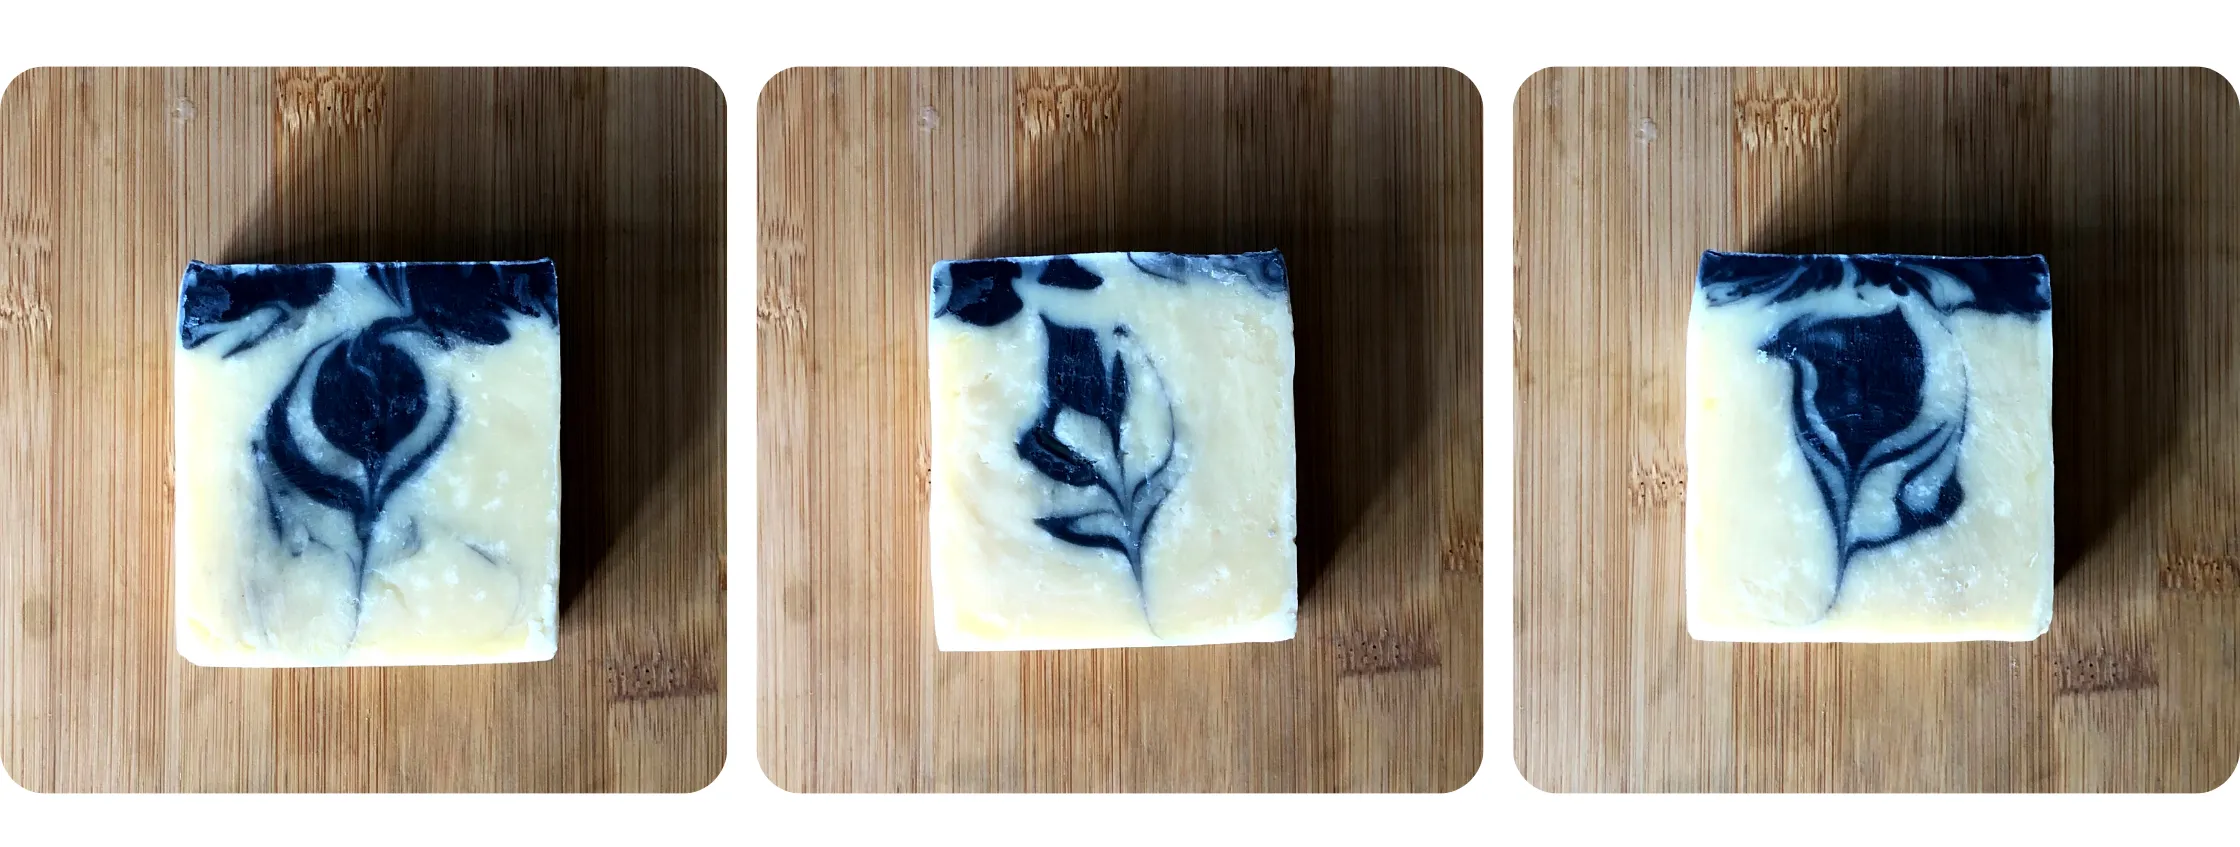
The soap came out of the mould relatively easy and there were encouraging signs that the swirl had been a success - and there was no black on the sides of the soap loaf meaning it was a true hidden swirl.
So I made my first cut with the knife and the soap was still a little soft in the middle meaning it really stuck to the knife and I had to twist it a full 360 to get it off the knife - but to my absolute relief it had worked! Ok it wasn't really a secret feather more of a secret flower or leaf - but it looked amazing - I was so pleased. The knife sticking to the soap had resulted in a bit of smudging but they still looked ace - I was really proud that my first attempt hadn't been a complete disaster.
This is the technique I was thinking about using a variation of for my Christmas tree soaps - so I now know for those that I will probably need to make sure the batter is a little less fluid to ensure I get straighter lines but nothing a little practice wouldn't help!
What I have also learnt is I definitely need to use a wire cutter for these soaps and I could have done with cutting them when the soap was a little harder - but I think I was patient enough waiting another 12 hours to cut them! I am also really beginning to see the effect temperature and humidity has on the soap. To be honest our kitchen is pretty cool most of the time, it only gets hot for a few weeks in the summer (basically now!). And one way of helping the soap harden up quickly would have been to pop it in the freezer. Although that isn't really an option at Small Kindness HQ as we only have a really small freezer on top of our fridge which we can just about fit peas, spinach and hash browns in!! Anyway I digress - I really love this technique, I definitely need to practice it a few more times but I think it will make it into my core soap collection and hopefully will be the pattern for one of my Christmas soaps! I'd love to hear what you think in the comments below.
Anyway that is me done for this week and I am off to practice my hidden feather swirl.
Take care xx
...
I am Kelly Townsend and this is the Small Kindness Blog. I am a scientist, a bee lover, a rewilding obsessive, and I want to spread Small Kindnesses through the medium of soap. Follow me on Facebook, Instagram and Twitter for your daily dose of kindness (as well as to see how the soap making is going!)